McCarthy Building Companies uses SketchUp Pro to streamline and enhance current processes which increase collaboration, improve quality, and reduce cost. Below is an excerpt of a case study we received from McCarthy. Visit our website to read the complete case study (and see more models).
McCarthy serves its clients with the latest technologies to solve their toughest construction challenges. We’re true builders who utilize technology to augment our hands-on experience. That combination ensures clients get greater control—from preconstruction to completion. On-time scheduling, higher quality, safer projects, and better costs are just a few of the ways customers benefit from this unique approach. McCarthy also has a nationwide network of builder specialists, yet we maintain permanent offices in local markets too. That means we deliver expert solutions leveraging national best practices, plus strong sub-contractor relationships locally to help lower client cost and drive better results. It also means we have adeeply-felt obligation to give back to the community in every city we work in from coast to coast.
Challenge
Buildings and jobsites are becoming more and more congested and difficult to envision from just a set of 2D drawings. Designers and Engineers are creating structures in a 3D environment for placement in a 3D world. Building systems are rapidly evolving to implement new technologies that have not yet been implemented into construction before; resulting in challenging interfaces. It is no longer acceptable to go into a meeting with an owner with a hand-drawn site logistics plan. As a result of these challenges, McCarthy has instituted the use of Google SketchUp as a virtual construction tool to adapt and overcome to the challenges of the ever-evolving construction environment of the 21st century.
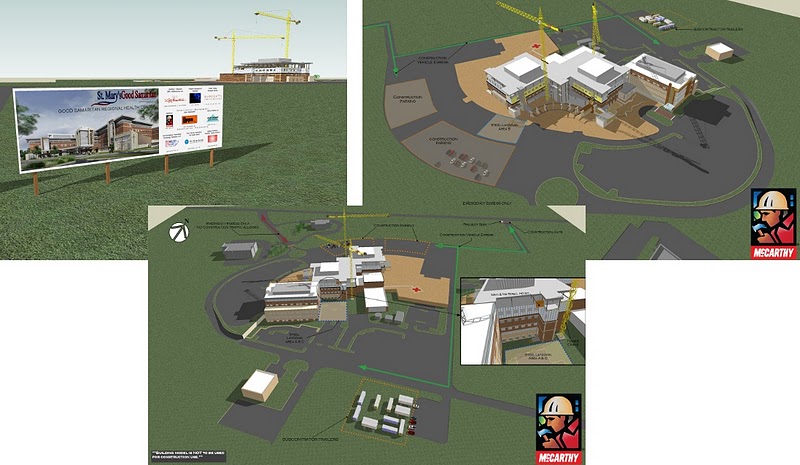
 While working in conjunction with BSA LifeStructures this model, presented through LayOut,
was used to communicate the site logistics during construction.Solution
McCarthy is committed to continuous innovative improvements to our building process. Utilizing SketchUp, our teams have been able to convey critical information in all phases from pre-construction to close-out, enhancing our Virtual Design and Construction services.
Site logistics – We have found that by creating a site logistics plan utilizing SketchUp, we can now show owners where we will be, and how it will impact their employees and clients.
RFIs and Virtual Mock-Ups – Our field staff is now finding solutions virtually, using SketchUp for RFI’s, mock-ups, self-perform concrete, and other details.

Virtual Construction Visualization – SketchUp has also been used to create concrete lift drawings to help the trades visualize the task from start to finish – potentially catching any accidental omissions before starting actual construction.
Results
By modeling our RFI’s, site logistics plans, building mock-ups, self-perform concrete, and many other details, we have found increased efficiency, better quality, and reduced costs. The aforementioned products have allowed us to improve our relationships with Owners, Architects and Subcontractors creating a collaborative environment that is beneficial to all parties.
As a leader in BIM technology, our vision is clear and we have been able to reduce cost by utilizing SketchUp to pass those savings onto our owners. One of the reasons Google SketchUp is such a powerful tool at McCarthy is the small learning curve and low cost. Most of the BIM systems out there have a larger learning curve and higher price. SketchUp’s ease of use and the availability of extensive online training, has allowed our teams to remain on-site and implement their new tools faster. SketchUp has allowed our quality department to standardize and visualize our best practices for our Building Enclosure Program, allowing these models to be used as a baseline for future projects. McCarthy holds an annual SketchUp contest throughout the company to enhance SketchUp’s use. Google SketchUp is now being utilized in almost every department from owner presentations to RFI’s. SketchUp has allowed us to continue to have the hands-on approach we need to be the best builder in America.
Posted by Chris Dizon, SketchUp Pro Team
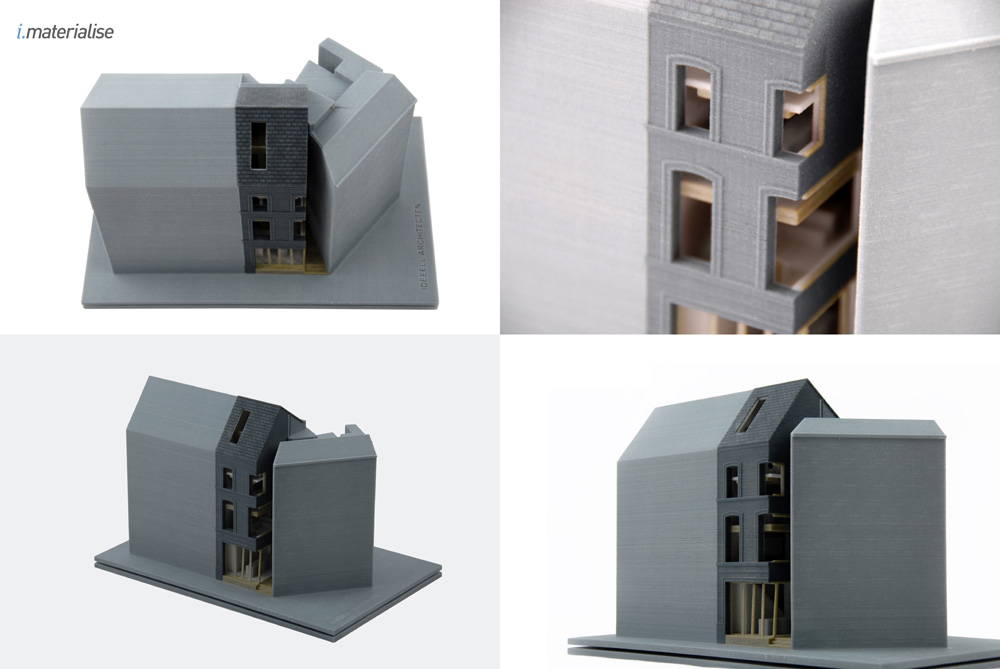 A model printed from a SketchUp file using the i.materialise plugin